
One of our clients told me they estimate they lose 5 to 10% efficiency in their heat exchangers, on average, because of bypassing across the pass partition. That's crazy. That's a lot of lost heat transfer. I'm not a money guy at a plant, but I'm guessing that impact isn't pretty.
What We Found
The other thing that astonished me happened on a recent project. We started inspecting pass partition heights, because with FlangeVision it's quite easy to do. Most of them failed the ASME PCC-1 criteria. And not by a little. We're talking 30 to 50 thousandths of an inch out, which is three to five times the allowable. They were warped, corroded, not straight. Just a mess.
Partway through, some of the people running the job asked us to stop inspecting the pass partitions because they didn't want to see the results. The engineers wanted us to keep going. The message from the schedule side was basically: bolt it up and let's get back to business, boys!
I think that was healthy infighting. Because of it, a bunch of pass partitions got repaired at the engineers' request. Before, they would have gone back into service without a second thought.
Why Pass Partitions Get Skipped
If your incentive is to get the plant running again as fast and as cheaply as possible, you're going to skip fixing your pass partitions. Nobody will ever see that leak, and there aren't good sensors or methods to tell if an exchanger is bypassing.
This plant has been operating for a long time, and they told us they had never inspected their pass partitions before. That makes sense. If you're using a machine to do your runouts, having that same machine inspect the pass partition isn't really practical. A straight edge is a challenge in itself and prone to human error.
A Few Clicks and You're Done
Inspecting a pass partition with FlangeVision is so easy that it's almost inexcusable not to do it. Here's how.
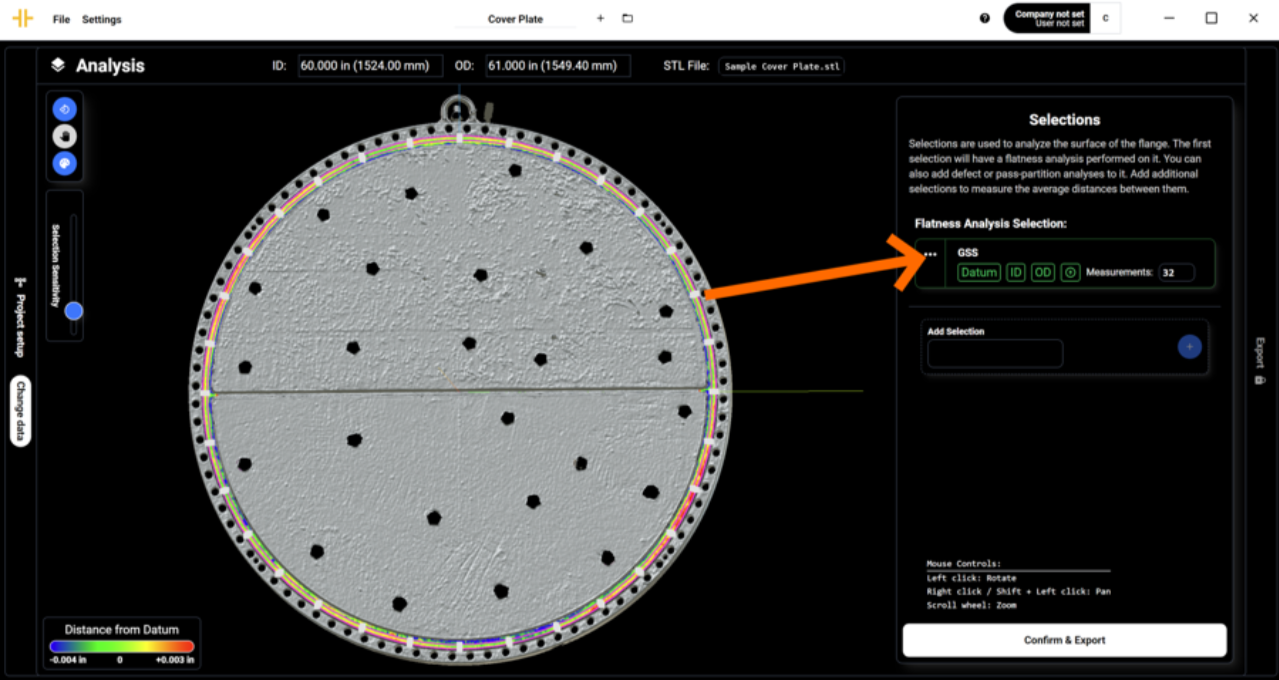
Step 1: Click the three dots
Once you've set up your gasket seating surface (GSS), click the three dots next to it.
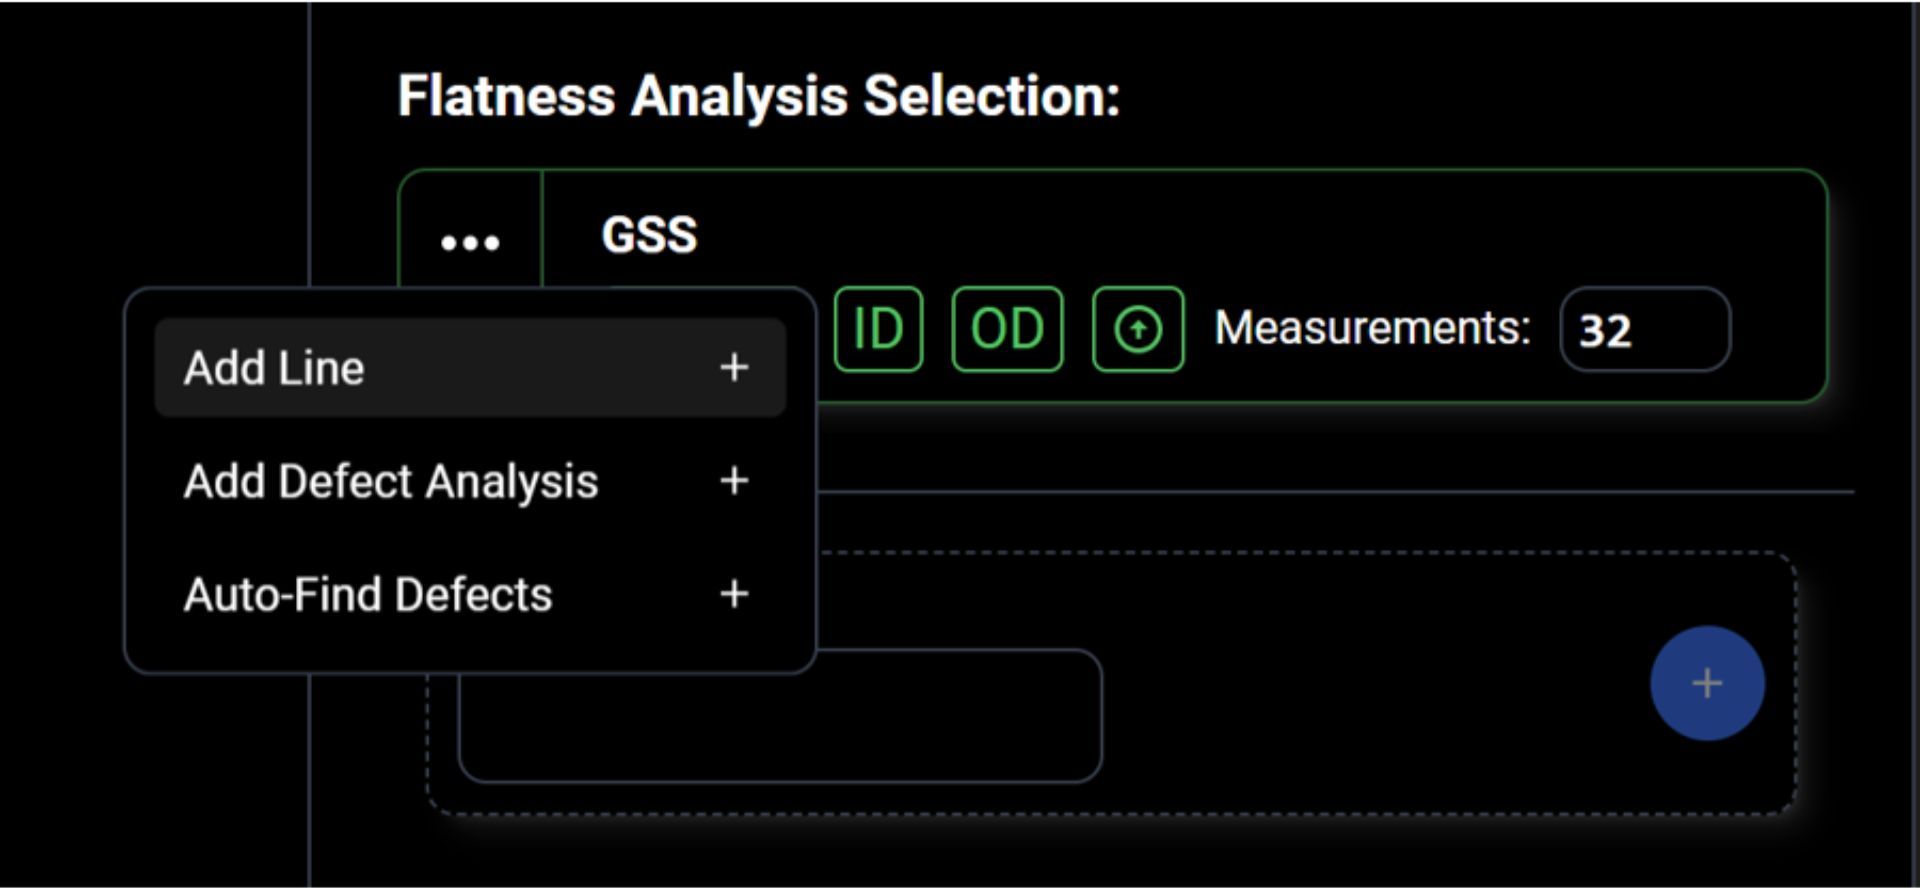
Step 2: Add a line
Click "Add Line."
Step 3: Draw the line across the pass partition
Draw your line across the pass partition. If the partition isn't straight, you can add points to kink the line and follow it. Otherwise, just draw it straight across.
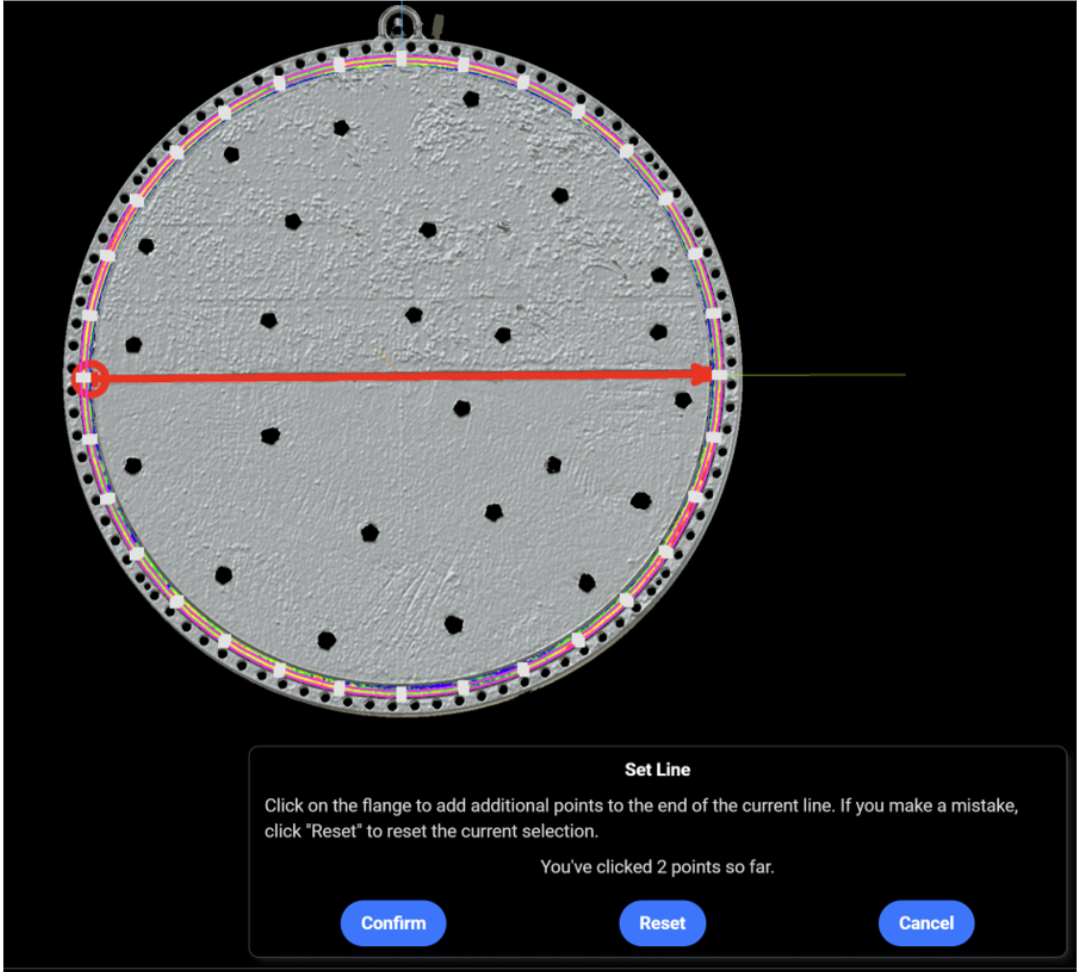
If your exchanger has more than one partition, add a separate line for each one.
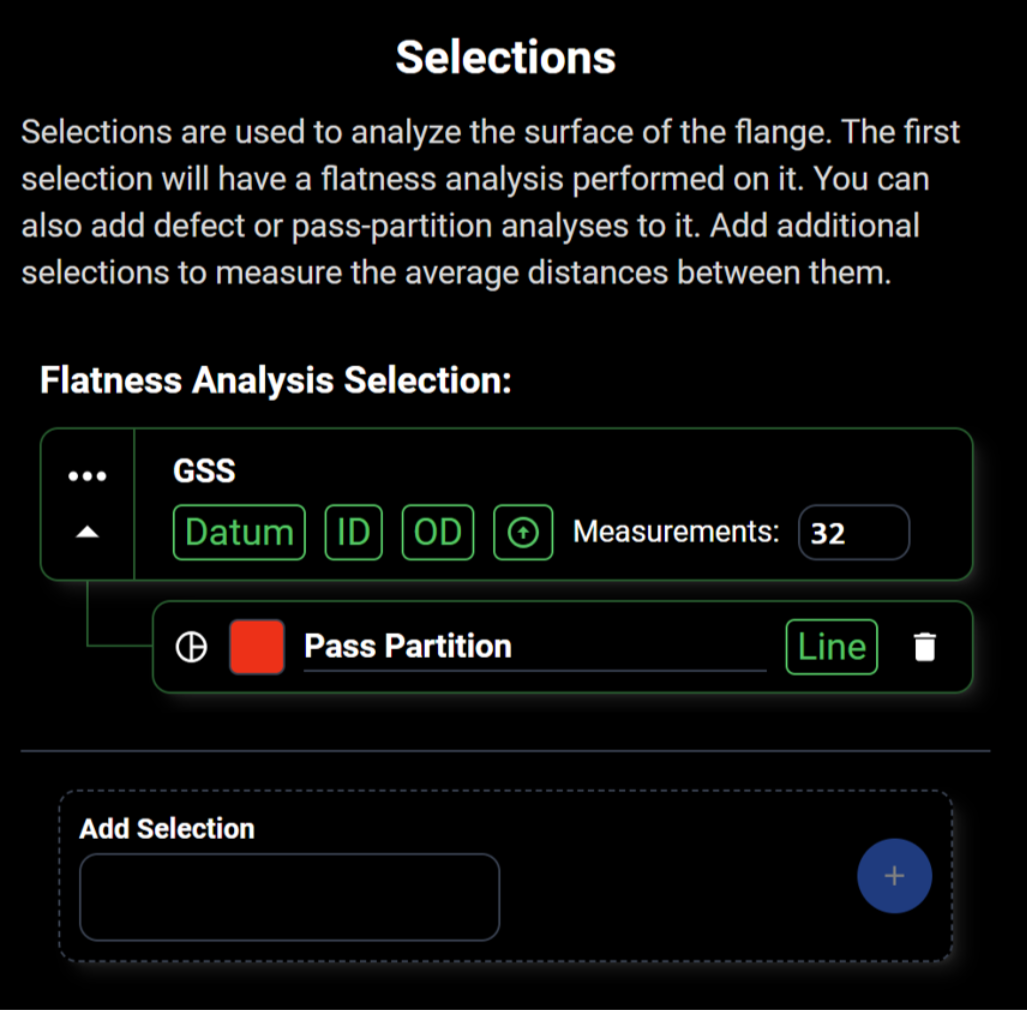
Step 4: Rename the line
Once the line is set, rename it. We called ours "Pass Partition."
Step 5: Confirm and export
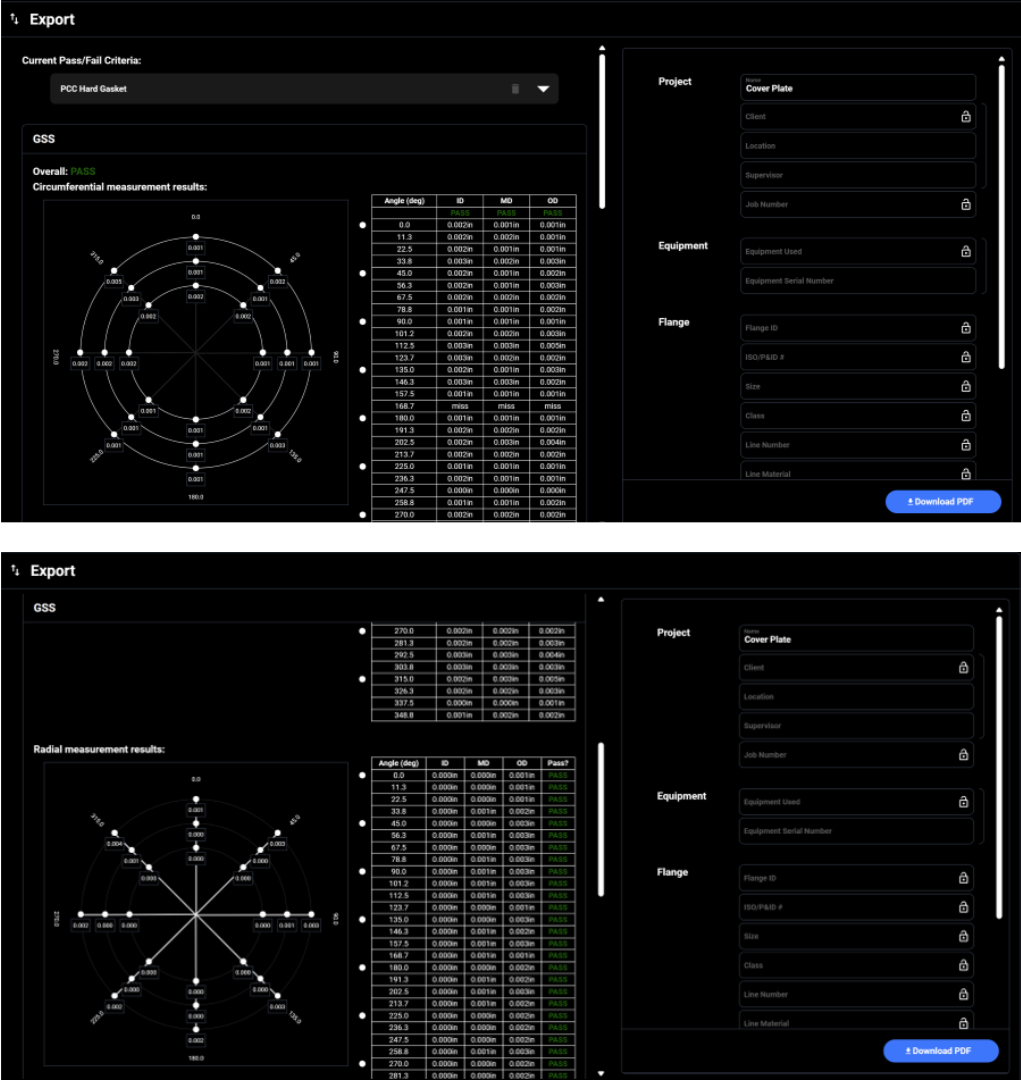
Click "Confirm & Export." The preview screen shows the circumferential flatness first. Scroll down to see the radial flatness.
Step 6: Check your pass partition results
Below that, you'll find your pass partition measurements.
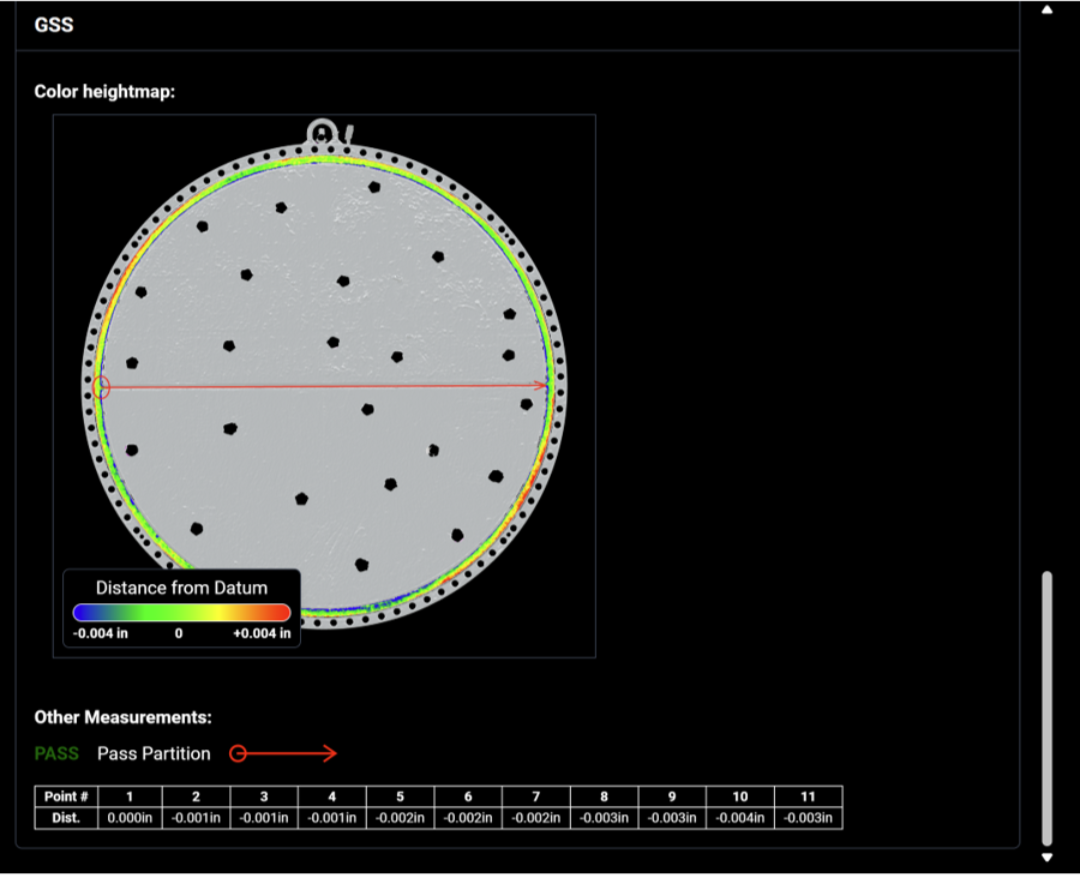
Sample cover plate: pass partition between 0.000 and -0.004 in. PASS.
A few clicks, and you're done.
Those few clicks could be the difference between putting an exchanger back into service for years while it's bypassing, and putting one back that's actually sealing across the partition.
Check Both Sides of the Joint
The cover plate in the example above passes. Its pass partition sits between 0.000 and -0.004 in, inside the allowable range of 0.000 to -0.010 in.
The channel head it bolts up to is a different story. Eight of the ten points along its partition plate fail, and the worst one sits 0.032 in below the gasket seating surface. That's more than three times the allowable.
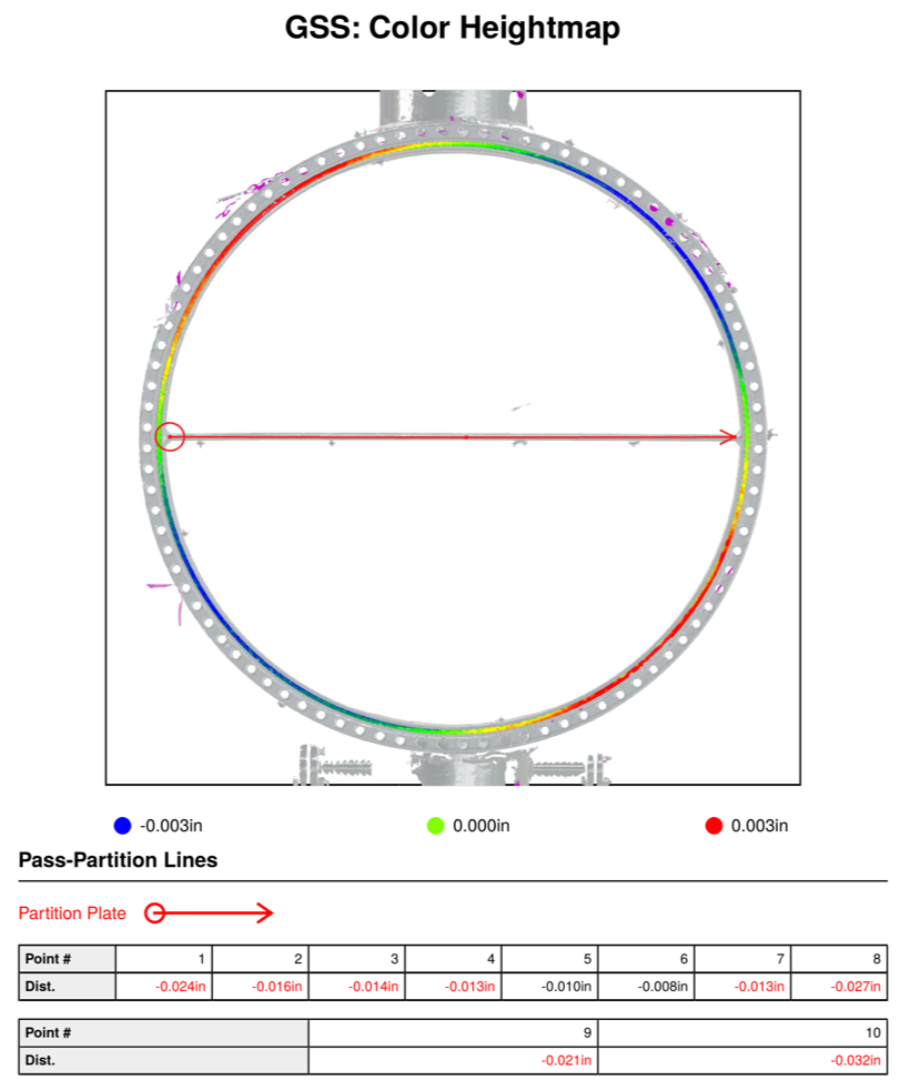
Sample channel head (the mating side): eight of ten points out of tolerance, worst at -0.032 in. FAIL.
You'd never know that from looking at the cover plate alone. Inspect both sides.
Are You Checking Yours?
Do you inspect your pass partitions today? If you do, how are you doing it? If you don't, what's stopping you?
I'd really like to hear from you.
Just because some people might not want to see the results, that's exactly why you should look.
Tim Gaida, P.Eng. President, My Engineering Ltd.